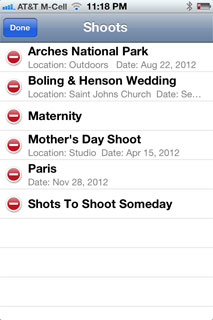
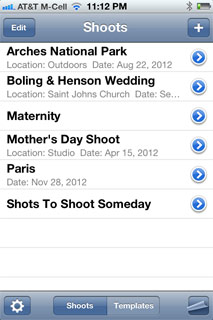
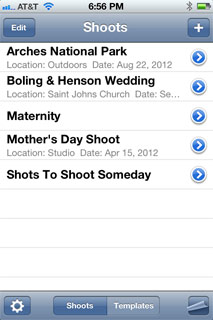
Main Shoot List
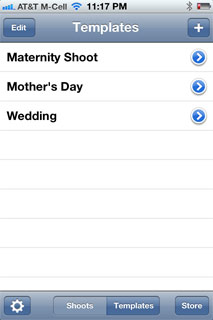
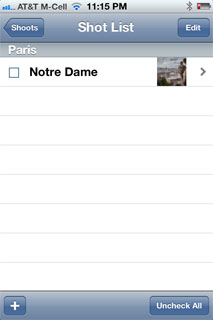
The Shoots screen is the main screen for the application. This lists all of your upcoming shoots.
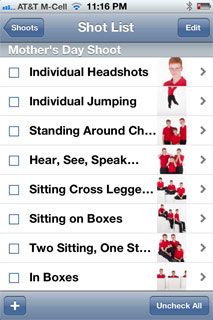
To View Details for a Shoot, select one of the Shoots from the list. This will bring up the Shot List for this Shoot
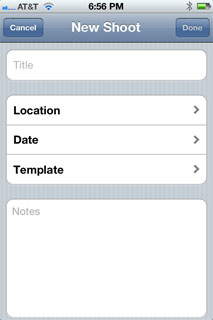
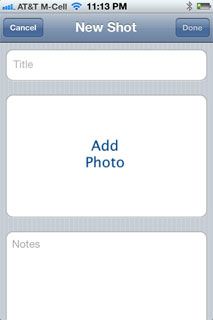
To add a Shoot to the list, press the + sign in the upper-right corner. (example)
To edit a Shoot, press the blue triangle on the right edge of the screen. This will bring up the Edit Screen.
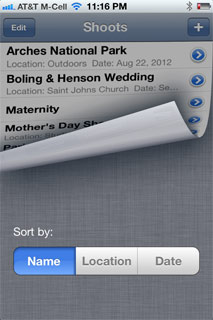
Sorting the Shoot List
Pressing the page curl icon on the lower-right corner of the Shoots list will bring up this screen which will allow you to sort you shoots by Name, Location, or Date.
Shot Checklist
The Shot Checklist screen shows the shots to take for a given Shoot (in this case the Mother's Day Shoot).
To View Details for a Shot, select one of the Shots from the list. This will bring up the Shot Details.
Check off completed shots by clicking the Check-box to the left of the Shot. You can uncheck all of the Shots by selecting the "Uncheck All" button in the lower-right.
To add a Shot to the list, press the + sign in the lower-left corner. (See Creating a Shot List)
To Sort the List or Delete a Shot, press the "Edit" button in the upper-right corner.
This shows the details of the shot which includes the Title, Notes, and sample image. Clicking on the "Edit" button in the upper-right will take you to the edit screen where you can change this information.
Shot Details in Landscape Mode
Rotating the screen to landscape mode will show the details for the Shot. Clicking the left and right arrows in the upper-right will scroll through the Shots in the list.
New Shoot
Click on the '+' icon from the Shoots screen will bring up this New Shoot screen.
Title - The name of the shoot
Location - (optional) This is where the shoot will occur.
Date - (optional) The date of the shoot
Template - (optional) If you often repeat shoots you can create a template
used to populate the shot list.
Notes - (optional) Any additional details about the shoot.
Selecting a Location
This is a list of possible locations for the Shoot.
You can add locations from the Settings Screen
Shoot Date
Scheduled means whether the Shoot should have a date assigned or not. If assigned the date is selected using the Date picker.
Templates
This will show a list of pre-loaded Shot Lists. You can create your own templates or purchase pre-done templates from the iTunes store.
For more details about Templates click here.
Select the Shoot
Each Shoot has a Shot List attached to it. After creating a New Shoot, select that Shoot from the Shoots List to go to the Shot List. In this example we select Paris from the list.
Add a New Shot
To add shots to a Shot List. Press the '+' button in the lower-left corner.
New Shot Screen
In the New Shot Screen you can add a shot Title, Notes, and a sample Photo.
Enter a Title for the Shot
Clicking on the Title field brings up the keyboard so a Shot Title can be added. Which is Notre Dame in this example.
Select a Sample Photo
Clicking on the Add Photo box in the New Shot screen brings up the Camera Roll. Navigate to the photo you wish to add and select it.
Crop and Scale
Once a photo is selected you have the opportunity to scale and crop the image. One you are done press the Choose button to add the photo to the Shot List.
You've add a Shot
Here is the newly added shot added to the Shot List.
Accessing Templates
Templates are pre-loaded shot lists and are useful if you often do the same sort of shoots, such as weddings or other events where you need to be sure to get a certain set of shots.
To manage your Templates select the Templates button at the bottom of the Shoots screen.
Template List
The template list shows a current list of templates.
To add a Template, press the + sign in the upper-right corner. Templates are created just like Shot Lists.
To delete a Template, press the "Edit" button in the upper-left corner.
To purchase pre-done Templates, press the "Store" button in the lower-right corner. (see store sample below)
Template Store
The template store will list pre-done templates that you can purchase from the iTunes Store. New templates will be added on a regular basis and will include events, travel locations, posing guides, and more.
Clicking on a item in the list will take you to a description of the template.
Template Description
This will give a description of the template and show 3 sample photos from the template.
Settings
To add and delete locations, go to the settings screen by clicking on the "Settings" icon in the Shoots List or Template List. Then select Locations.
Locations
This lists the locations.
To edit a location, select the location from the list.
To add a new location, select the '+' button in the upper-right corner.
To delete a location, swipe across the location with your finger and the "Delete" button will appear. Press the button to delete the location from the list.
Adding/Editing a Location
To add or edit a location type the name of the location into the field and press the "Done" button.